


Unbox & Assemble Your LED Sign
Follow this guide to safely unpack, identify all parts, and assemble your LED sign step by step.
Watch: Full Assembly Walkthrough
Prefer to read? The full written guide is below. You can also view the original guide at ledsigncity.com.
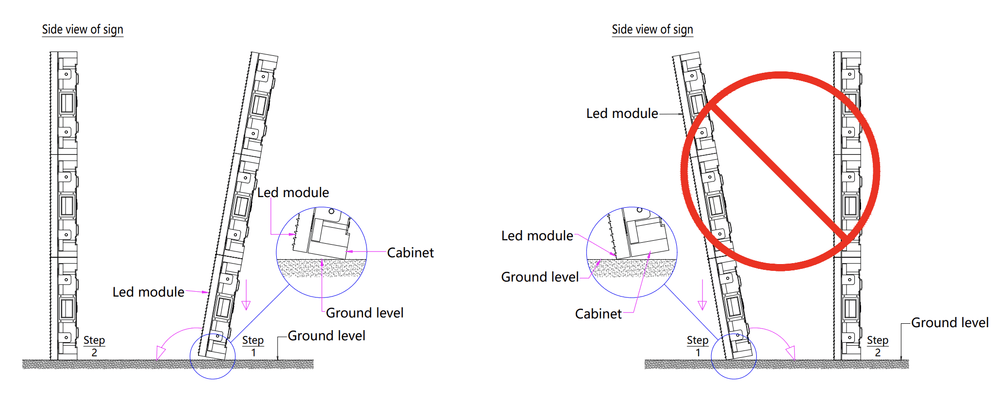
How to Handle the Crate When Unpacking
Read these before you touch the shipment — improper handling can damage the LED modules.
Tip #1
Always keep the crate upright. Avoid laying the crate flat on any of the sides.
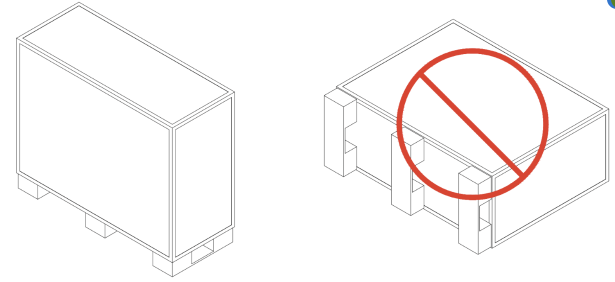
Tip #2
Take care when unpacking the sign and avoid placing the weight of the sign on the LED Modules.
Preparation: What's Included & What You Need
Lay everything out and confirm you have all included items. Then gather the tools listed below before you start assembly.
✓Included in the Box
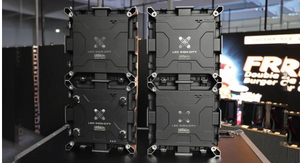
LED Sign Cabinet Sections
quantity varies by sign size
M8 Bolts
for connecting cabinet sections
M10 Bolts + X-Brackets
for cross-section anchoring
Mounting Brackets
for pole or wall attachment
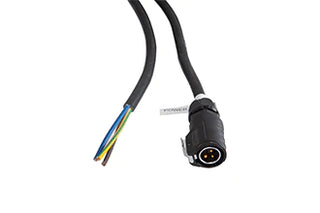
Power Cables
13/14 AWG with 3-pin weatherproof connector
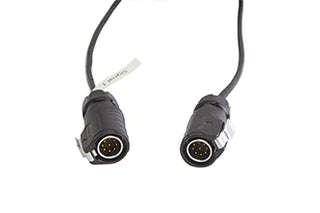
Signal Cables
9-pin connectors on both ends
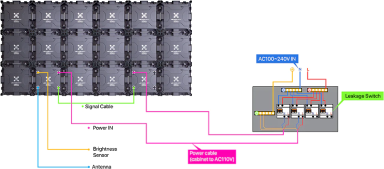
Network Antenna + Antenna Cable
for Wi-Fi connectivity
Brightness Sensor
auto-adjusts display brightness
Provided Socket / Wrench
for tightening M8 bolts
!Tools You Must Provide
13/14 MM Ratcheting Wrench
not included
17MM Socket
not included
Drill / Driver
not includedUnderstanding Cabinet Section Types
Before assembling, inspect the edges of each cabinet section. There are three configurations — understanding them helps you orient the sign correctly, especially for multi-row signs.
Open tunnel with rubber seal
Center edge. Ensure the rubber seal is in every slot before connecting M8 bolts.
Open tunnel with open-center metal gasket
Center edge — preinstalled. Used where sections meet vertically (multi-row bottom of top row).
Closed tunnel with solid metal gasket
Outside edges only. Sections with closed tunnels on top go in the top row.
For multi-row signs: sections with closed tunnels on top go in the top row. Sections with an open tunnel on top go in the bottom row.
Step-by-Step Assembly Instructions
Align the LED Sign Sections
After unpacking your X Series LED Sign, arrange your sign cabinets in sequence (A1, A2, A3…) so that a clear hole aligns with the threaded hole. For multi-row signs, start with the bottom row first.
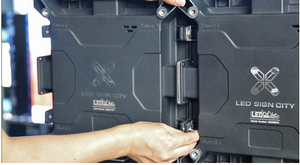
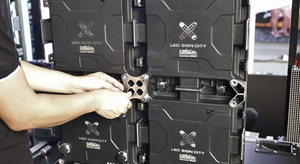
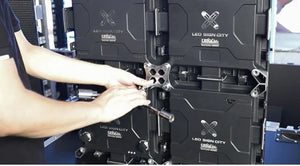
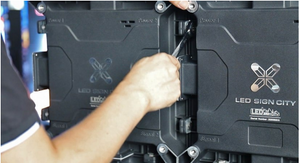
Insert the M8 Bolts
Insert the bolt through the clear hole and screw it into the threaded hole to hold the signs in position. Each cabinet has two holes on the side. You need two M8 bolts per cable tunnel — for example, three cable tunnels = six M8 bolts.
Fasten the Bolts
Use the provided socket to fasten the upper and lower bolts on the side of each cabinet. Pay close attention to the front of the sign to ensure the LED bulbs are aligned as best as possible between sections.
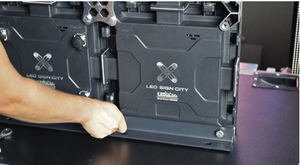
Attach the X Clip
Place the X Clip in the center of every four cabinets and screw in the M10 bolts to hold the clip in position. There will be an X-Bracket at the intersection of every four modular cabinets.
Install the Mounting Brackets
Position the brackets on the back of the sign and use the provided bolts to secure the brackets to the sign. Connect brackets as needed for your specific installation method.
Lock Sign Sections Together
Connect multiple sections to assemble the required dimensions. For larger signs with stacked rows, install additional M8 bolts where cable tunnels on the top of the bottom row and the bottom of the top row intersect (two bolts per cable tunnel). Verify a silicone seal is on top of the bottom row and an open-center metal gasket is on the bottom of the top row.
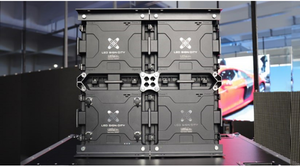
Complete Assembly
Your assembled sign should resemble the illustration. After connecting all sections, install the supporting X-Brackets at each intersection of four modular cabinets.
Installation Examples
Most LED sign installations fall into one of three categories. Your engineered drawings will specify the exact requirements for your site.

Freestanding — Single Pole
Ideal for roadside or ground-level installations. One pole anchored in a concrete footing.
View Details
Freestanding — Two Poles
Additional support for larger and heavier sign cabinets. Two poles anchored side by side.
View Details
Wall Mounted
Mounted directly to a building surface. Requires reinforced structure and weatherproof sealing.
View DetailsNote: Structural supports, concrete footings, fabricated framing, and electrical hookup are customer responsibilities in DIY installations.