
LED Sign Programming Guide
Control your LED sign locally using a Windows or macOS laptop/PC. Update and manage content securely and efficiently while you're on-site.
Table of Contents
2. Connecting Computer to the LED Sign
A. Using Only the Access Point
B. Using the Optional 4G Antenna
3. Initial Setup of Viplex Express Software
a. Choosing Your Mode
b. Creating and Naming Your Solution
1. Download Viplex Express: Your LED Sign Programming Software
The software for your sign is Viplex Express. Once your download is complete, open the Viplex Express (.exe) file and complete the installation.
2. Connecting the Computer to the LED Sign
The CPE antenna creates a local network that you can use to connect to your sign.
Access Point Only
Depending on whether the antenna is programmed or not, follow the appropriate steps below:
🔧 If the Antenna Is Not Programmed
- Connect to the Access Point (AP) Network
- Open your device’s Wi-Fi settings.
- Connect to the AP network broadcast by the sign.
- Launch Viplex Express
- Open Viplex Express on your computer.
- Click Refresh to detect the device.
- Log In to the Device
- When prompted, use the password: SN2008@+
How to program the antenna? Click here to see
📶 If the Antenna Is Programmed
- Open Wi-Fi settings and connect to SignCity
- Use the password: Signcity123
- Launch Viplex Express
- Open Viplex Express
- Click Refresh to detect and connect to the sign
Connect the sign to the optional 4G antenna (Wireless Connectivity Anywhere)
If you selected the optional 4G modem, connect the modem to the antenna port on the sign. Wait for the modem to power on. Then search for the wireless network 'Signcity' and enter the password Signcity123. Once connected, open Viplex Express and proceed to the next step.
3. Initial setup of Viplex Express
When you launch Viplex Express for the first time, you have two choices: Studio Mode and Async Mode.
Studio Mode
Studio Mode refers to a live connection where your screens play advertisements directly from an external source, such as your computer. Studio mode is an optional upgrade. If you did not purchase this addon, select Async mode.
Async Mode
Async Mode is an offline connection where you upload content to the sign's local storage using your PC or mobile device. The device will be listed on the terminal table when you connect to the Signcity or AP network.

The image below shows the possible device status.

Creating and Naming Your Solution
Once the player is listed, it may log in automatically. If successful, the player will show a green icon to indicate that the player is online. Sometimes you see an orange icon next to the player. The orange icon means you connected to the player but have not logged in. If this happens, click connect and enter the following
- Username: admin
- Password:
- SN2008@+ (if the sign was purchased after March 2024)
- 123456 (if the sign was purchased before March 2024)
Once you log in, take note of your screen size. Then click the Solutions tab.

Click New Solution, then select Regular Screen.

Name your Solution and then enter your screen size (Width and Height) and click OK.
You can import your images and videos on the next page or create new text files. You can also add other elements, such as time and weather.
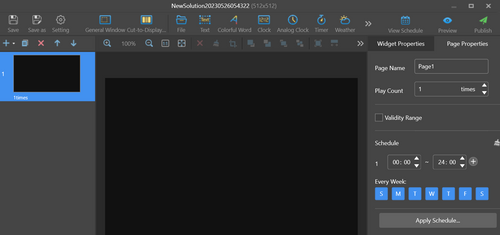
Once completed, click Publish to upload your Solution to the sign.

Now that you have the basics, you can experiment with the various elements. Publish your creations to see how they look on your sign.
Schedule An LED Software Training Session!
Notes:
- Access Point: A device that creates a local Wi-Fi network, ideal for locations close to the sign.
- Client: A device that works with the Access Point to extend the Wi-Fi coverage, suitable for larger areas.
- 4G Antenna: Provides wireless internet connectivity, perfect for remote or hard-to-reach locations.