Ocean City Project Review
Ocean City Project Review
This webpage provides an overview of the Ocean City project, covering key aspects like design options, communication methods, and cloud access setup.
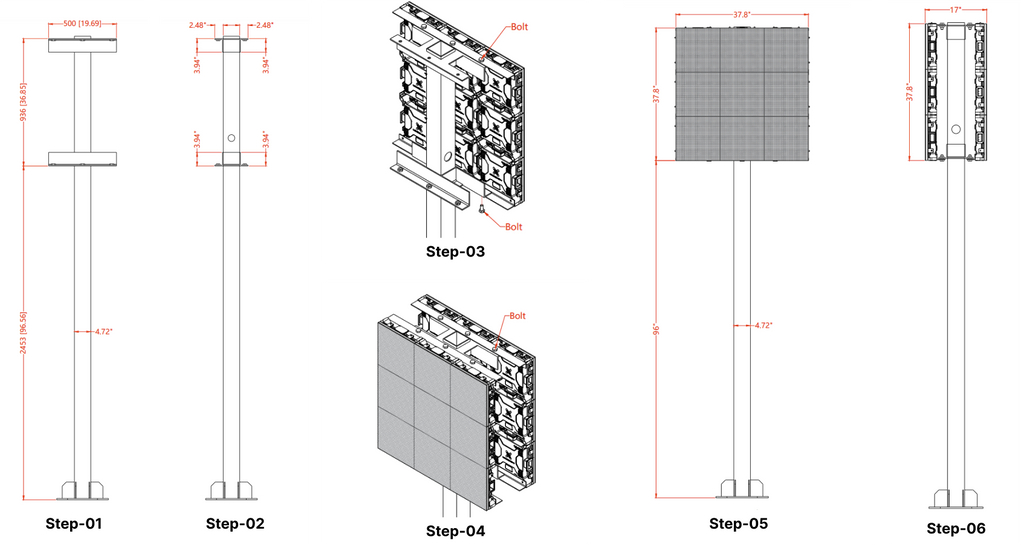
Original Design: This was used for the initial quote and assumed a single pole, center-mounted sign.
3x3

3x5

5x5

Change Order: The revised design requires the sign to be side-mounted and includes additional reinforcement.

(Optional) Aesthetic Feature: Panel Options
- Double-Sided Signs: Includes side panels.
- Single-Sided Signs: Includes side and back panels.

Communication Options
When setting up your sign, several communication options are available to ensure seamless connectivity. Below are the recommended hardware and alternatives:
Included:
- WIFI / LAN: Standard communication methods provided.
-
Hardware Provided:
- Point to Point: For direct, long-range communication.
- Repeaters: To extend the reach of your existing network.
Optional: 4G Broadband
- Hardware Option: While we've tested primarily with Verizon, other carriers with similar specifications should work as well.
Embedded Option
- Quectel 4G Module EG25-G: This module integrates directly with the controller, providing a compact and reliable 4G connectivity solution.
Outdoor Modem
- KuWFi 300Mbps Outdoor 4G LTE CPE: A wireless modem and internet hotspot designed for outdoor use. The sign is equipped with a 24V PoE adapter, which should be compatible with other capable PoE modems.
Internal Modem
- InHand Networks IR302 Industrial IoT 4G LTE VPN Cellular Router: This 4G LAN modem comes with two output ports, providing robust internal connectivity.
Note: Alternatives with similar specifications should work effectively. For the outdoor CPE, the provided equipment can also be configured as repeaters, allowing you to reuse an active internet connection.
Software
Cloud Access Instructions
To access and display content on your sign through the cloud, follow these steps:
Step 1: Visit VNNox Cloud Platform

- Open your web browser and go to us.vnnox.com.
- Log in using your credentials. If you don't have an account, you will need to create one.
Step 2: Adding HTML Code to Your Sign
- Once logged in, navigate to the Solutions tab.
-
Create a New Solution or Open an Existing Solution:
- Create: Select "New Solution" to start a fresh project.
- Open: Choose an existing solution to modify.
-
Add a Page:
- Click on Add Page to create a new content section for your sign.
-
Select Webpage:
- From the options, select Webpage to insert external content.
-
Enter the Web URL:
- Input the URL of the webpage you want to display on your sign.
- Save your changes.
- Click here to learn more

Step 3: Publishing Content to Your Sign
- After adding the content, select Publish to prepare it for display.
-
Choose the Sign:
- From the list of connected signs, select the specific sign on which you want the content to be displayed.
- Confirm your selection and complete the publishing process.
- Your content will now be displayed on the selected sign.


