New Sign Set Up: Items Needed for a Successful LED Sign Set Up Support Session
When preparing for a support session for your LED sign, having the right tools and setup ensures a smooth and efficient process. Here’s a checklist of items you’ll need to have on hand before your session to ensure that we can resolve any issues quickly and effectively.
Table of Contents
- Minimum of 60 Minutes Uninterrupted
- Windows Computer
- Wi-Fi Repeater
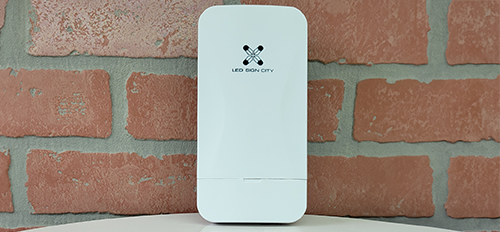
- POE Antenna
- Ethernet Cable
- Wi-Fi Network and Password
- ViPlex Software
- Vnnox Platform
- Sign Powered On
- Connect the POE Adapter and Antenna to the PC
- Connect the Antenna (If PC does not have Ethernet Port)
1. Minimum of 60 Minutes Uninterrupted
Plan for a minimum of 60 minutes uninterrupted during the session. This will allow us enough time to walk through any troubleshooting steps and resolve any issues you’re facing without needing to rush through the process.
2. Windows Computer
To ensure compatibility with the software we'll be using, you'll need a Windows computer. This will allow us to access the necessary tools, including configuration and troubleshooting software, during the support session.
3. Wi-Fi Repeater
A Wi-Fi repeater helps extend the range of your network, especially if your LED sign is located far from the router. This will help ensure a stable connection during the session, which is crucial for remote troubleshooting.

4. POE Adapter
If your LED sign uses a POE (Power Over Ethernet) antenna, make sure it’s connected and ready. This antenna provides both power and internet connectivity to the sign, so it must be set up properly for us to work on the configuration.

5. Ethernet Cable
Having an Ethernet cable on hand is vital for a stable, wired connection to your LED sign or Wi-Fi repeater. This minimizes any potential connection issues during the support session.

6. Wi-Fi Network and Password
Please ensure that the Wi-Fi network you intend to use is available and functioning. Also, have the password ready, as we may need it to connect the LED sign or other devices during the session.
7. ViPlex Software
Ensure that the ViPlex software is installed and ready to use. This software is essential for configuring and managing your LED sign.
8. Vnnox Platform
Make sure the Vnnox platform is set up, as we’ll likely need to access this during the session to handle any content or connectivity issues.
9. Sign Powered On
Lastly, ensure that your LED sign is powered on and functional before the session begins. This will allow us to test changes and troubleshoot effectively during the support session.
10. Connect the POE Adapter and Antenna to the PC
To connect your computer directly to your LED sign using the POE adapter, follow these steps:
- Connect the POE adapter to the LAN port of your LED sign.
- Connect an Ethernet cable from the POE adapter to your computer’s Ethernet port.
- Make sure the antenna is positioned correctly and powered, ensuring a proper connection.


This setup allows your computer to communicate with the sign directly, enabling troubleshooting and configuration through the software.
11. Connect the Antenna (If PC does not have Ethernet Port)
If your PC does not have an Ethernet port, you can still connect the antenna using a USB-to-Ethernet adapter. Follow these steps:
- Obtain a USB-to-Ethernet adapter that is compatible with your PC.
- Plug the USB end of the adapter into a USB port on your PC.
- Connect the Antenna Ethernet cable to the Ethernet port on the adapter.
- Ensure the antenna is connected to the POE injector for both power and data transmission.
Once everything is connected, your PC should recognize the Ethernet connection through the adapter, enabling communication with the LED sign.


This solution allows you to connect the antenna even if your computer doesn’t have a built-in Ethernet port.
Conclusion
By having all of these items ready and available, you’ll be well-prepared for a productive and efficient support session. If you have any questions or need assistance gathering these items, feel free to reach out before the session!


