A Simple Guide to How to Download from Canva and Upload to Vnnox
Follow this quick guide to seamlessly upload your canva image/video to Vnnox and get your content shining bright.
Table of Contents
- Download images or videos from Canva.
- Unzip the files on Windows or Mac.
- Sign In to Vnnox.
- Upload the images or video files.
- Add a New Solution to organize content.
- Link the content to your solution.
- Publish and Display on your LED sign.
Step-01: Downloading Content from Canva
Step 1A. Log in to Canva:
Open Canva and log in to your account.

Step 1B. Select Your Project:
Find the specific project or design you want to download for your LED sign. This could be a single image, a series of slides, or an animated video.

Step 1C. Choose Download Options:
- Click on the "Share" button located in the top right corner.
- Select "Download" from the dropdown menu.

Step 1D. Select the File Type:
- For Images: Choose PNG or JPEG format.

- For Animation/Videos: Choose MP4 Video to retain any animations or transitions.

Step 1E. Download Specific Pages (Optional):
- If your design has multiple pages, select "Select pages" and choose the specific pages you want to download.
- For slideshows, you can download each slide individually as an image or download the entire slideshow as a video.

Step 1F. Initiate Download:
- After selecting the format and pages, click "Download" to save the file to your computer. Canva will compress all selected pages into a ZIP file if you're downloading multiple files at once.

Step-02: Unzipping the Downloaded File
After downloading, if you've selected multiple files, they will come in a ZIP format. Here’s how to unzip the file on both Windows and Mac.
Step 2A. For Mac Users:
i. Locate the ZIP File:
Go to your Downloads folder or the folder where you saved the file.

ii. Double-Click on the ZIP File:
The ZIP file will automatically unzip, creating a new folder containing all your images or videos.

iii. Access the Files:
Open the new folder to view your extracted files.

Step 2B. For Windows Users:
i. Locate the ZIP File:
Go to your Downloads folder or the location where you saved the file.

Select "Extract All…" from the context menu.

iii. Choose a Destination:
In the dialog box, select a folder where you want the extracted files to go. Then, click "Extract".

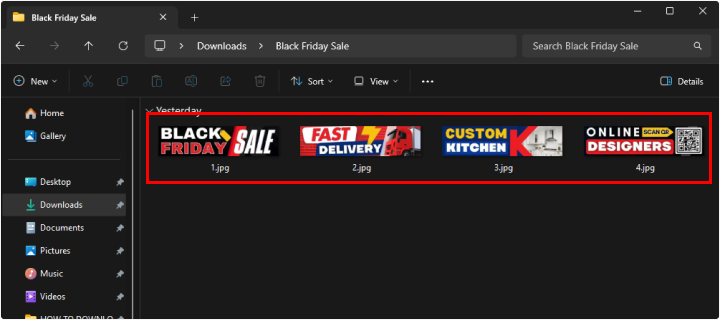
Open the destination folder to find all the images or videos ready for use.

Step-03: Prepare to Upload on Vnnox
Now that your files are unzipped, it’s time to upload them to Vnnox to display on your LED sign.

Step-04:
Uploading Videos or Images to Vnnox
Here's how to upload and set up your files on Vnnox to get them ready for display.
Step 4A. Sign In to Vnnox:
- Open Vnnox and sign in to your account.
- If you don’t have an account, you’ll need to create one.

Step 4B. Access the Content Tab:
- Go to the "Content" tab in the dashboard.
- Click "Upload Media" and select the images or video files that you want to add to your playlist.

Step 4C. Add a New Solution:
- Move to the "Solution" tab and click on "Add New Solution".
- Pro Tip: A "Solution" in Vnnox is essentially a playlist or collection of content items. This allows you to organize multiple images, videos, and texts into a sequence that will play on your LED sign.

Step 4D. Name Your Solution:
- Give your solution a memorable name that reflects the content, like "Black Friday LED Ads".
- Click the "Player" button and select the appropriate player from the list (the device where you will display your LED content).
- Click "OK" to confirm.

Step-05: Adding Video or Image Files to Your Solution
Step 5A. Click on the "Video" or "Image" Widget:
- If you’re uploading an image, click the "Image" widget.
- If you’re uploading a video, click the "Video" widget.
- This will automatically place the selected content in your solution.

Step 5B. Select Your File:
- From the uploaded content, choose the file(s) you want to include in the solution.
- Organize the files in the order you want them to display.

Step-06: Link the Video or Image to Your Solution & Publish
Step 6A. Link the File to Your Solution:
- Make sure the video or image is linked to the solution you created.

Step 6B. Publish the Solution:
- Click "Publish" to send the solution to the player.
- This will ensure your content is transferred to the LED display.

Step-07: Display on Your LED Sign
Step 7A. Select Your Player:
- Choose your player (the LED sign display device).

Step 7B. Confirm and Display:
- Press "OK" to confirm, and your content will start displaying on the LED sign as per your solution setup.


