Qolr Pro 1x31 Outdoor LED Sign
Maximize your message with the QPS-1012 from Qolr Pro Series - a standout 1 ft x 31 ft outdoor LED sign. Offering easy installation, extended warranty, and vibrant display options, it’s designed to elevate visibility and impact, effortlessly.
Maximize Your Business’s Impact with the LED Sign City Series 1X31 Outdoor Custom LED Sign
Unlock the potential of durable, dynamic advertising with the LED Sign City Series 1X31, a cornerstone in outdoor digital signage. Esteemed for its ability to deliver full-color, vibrant advertising, this custom LED sign represents a trusted solution for businesses aiming for unparalleled visibility. Equipped with cutting-edge technology, including free software and wireless communication, it empowers you to engage your audience effectively and effortlessly.
Key Features:
- Crystal-Clear Resolution: Select from high-resolution display options ranging from 1024 to 2304 pixels per module, ensuring your visuals are not just seen, but remembered.
- Design Versatility: Available as both a single-sided and double-sided sign, it's designed to fit your specific exposure needs and location.
- Sun-Defying Brightness: With brightness levels of 7000 to 10000 nits, visibility is guaranteed, even under the bright glare of direct sunlight.
- Simplicity and Support: Benefit from easy-to-use software accompanied by free design training, enabling you to craft compelling content with ease.
- Durability and Assurance: With a comprehensive warranty up to 15 years, rest assured your sign is built for longevity.
Beyond the Future - Upgradeable and Scalable
Future-Proof Design: The LED Sign City Series 1X31 is not just built to last; it's designed to evolve. With upgradeable options, extend its life beyond the impressive 15-year mark, ensuring your signage remains at the forefront of technology and efficiency. Scalable Solutions: As your business grows, so can your sign. This scalable feature means that should your advertising needs change, your sign can adapt—expanding in size to match your evolving requirements without the need for a complete replacement. A Trusted, Adaptable Advertising Investment
The LED Sign City Series 1X31 goes beyond traditional digital signage. It’s an investment in your brand’s future, offering the flexibility to grow and adapt with your business. Its proven track record of enhancing brand visibility and engagement, combined with the capacity for upgrades and scalability, makes it the ideal choice for businesses looking forward to a bright and dynamic future.
Step into a world where your advertising can evolve as fast as your business does. With the LED Sign City Series 1X31, embrace a solution that shines brighter, lasts longer, and ensures your brand stands out in every possible way.
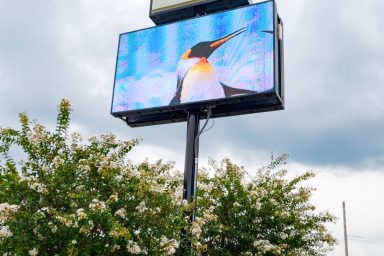
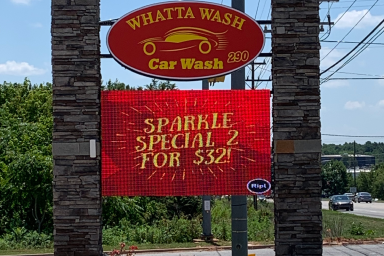
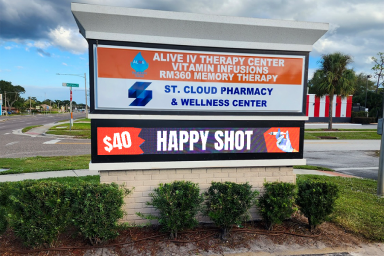
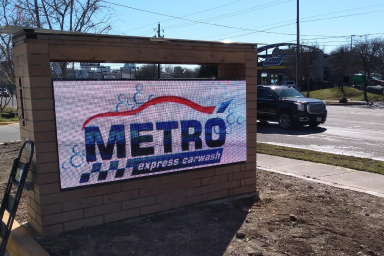
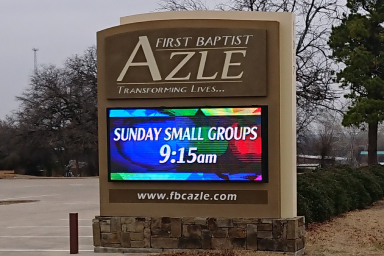
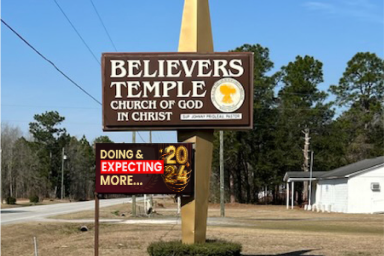
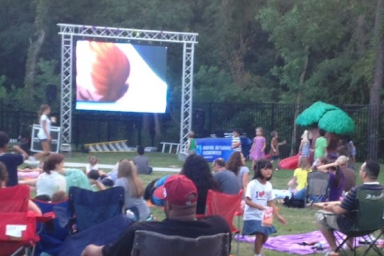
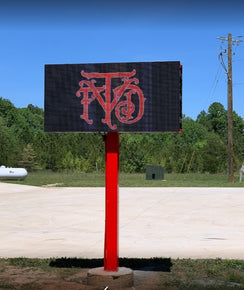
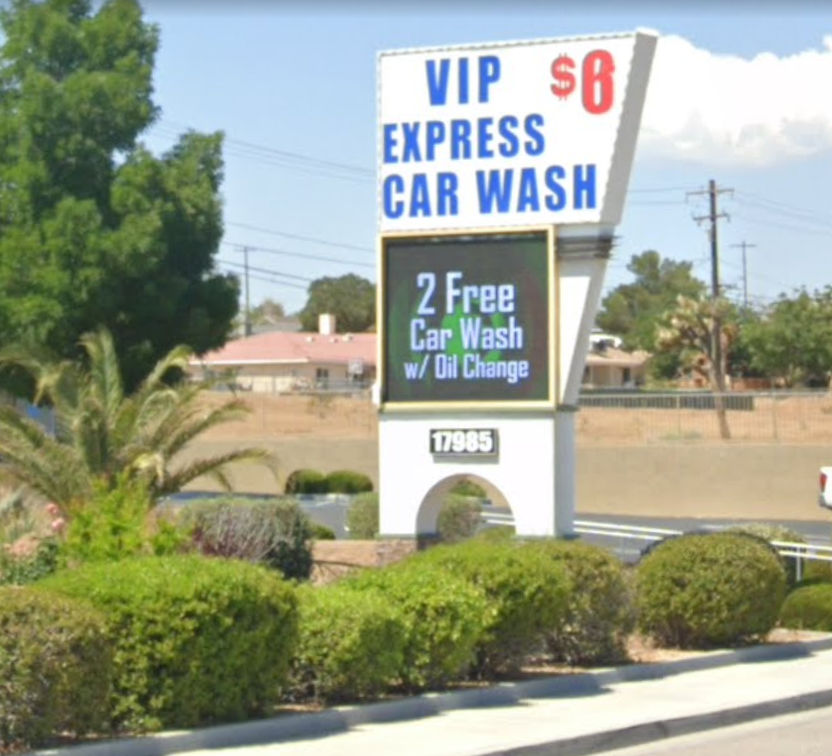
Discover the transformative power of custom LED signage with Color Pro's curated showcase of recently installed projects. This gallery highlights the adaptability and vibrant impact of our LED technology across a diverse range of settings, all accessible right here. From dynamic storefronts to engaging outdoor advertisements, each installation offers a glimpse into how Color Pro Turnkey LED Sign Solutions can elevate any environment. Begin envisioning your perfectly realized project by exploring the potential, here and now.
Inspired by our array of dazzling projects? Your idea could be next. Start the journey to illuminate your space uniquely or save your thoughts for future inspiration.
This sign has been working 24/7 for the last two years and paid itself off within the first six months. The company even offered low-interest financing options and incentives for cash payments to small businesses
Hey this is Gary Rice, Pastor at Evangel Assembly of God situated in Orlando, Florida. Installed this LED sign 4 years ago, we love it, our congregation likes it, the community likes it. It is a great addition to the church
Justin from Sensenig's Landscaping Supply 4 years ago (in 2019) purchased signs from LED Sign City for our Geneva, NY, and Rochester, NY locations. The digital sign is super bright, and you can adjust the brightness. It is very easy [software]. The LED sign also plays videos. Not only that, if you need parts or anything, the customer support has been great.
This is one of best designing team I ever deal with! I am so happy with service they provided me [with the 5x10 foot LED sign and the video ads for the sign]! All my projects will go to this company. I highly recommend them
Our company, IceWorks Skating Complex, had a tremendous experience with LED Sign City. Shane, one of their technicians, gave us his unwavering support in getting our sign it's needed upgrades and new software. They always answer the phone and get back to our needs promptly. We are so grateful to work with them!
This company is TOTALLY Legit!!! Best customer service out there! Shane is patient, knowledgeable and very helpful. If you are looking for an LED Sign, then I HIGHLY recommend this outfit!
FAST AND FRIENDLY GREAT SERVICE!!
I’ve been installing their equipment for over 2 years now. The equipment is easy to install. The versatility of the components make it a great fit your needs in Digital signage. I highly recommend using them and the installer network they’ve is Top Notch throughout the U.S. The prices are competitive & fair in today's market
LED Sign City has a very good product. The software has plenty of options for displaying your message. Tech support is awesome!
Great experiences! Shane Ramone has come through for me MANY times and is always so patient and respectful. He is a real pleasure to speak and work with. Hats off to LED Sign City and Shane!
Technical Support is excellent! LED Sign City is the place to go! Excellent service! Shane can fix any problem and walk you through anything. Very Knowledgeable!!
We had a fantastic customer service experience with LED Sign City. Shane is a customer service rock star. The sign we purchased is the Spotlight Series 37.8" x 75.6". We have just installed it and it is nothing short of superb. Great value, great price, great customer service.
This was just a big investment bu these guys did a great job and the sign is going strong after 2 years. The software is a little clunky but the support has been great!
Shane wasFANTASTIC. This update took a while because we have an older sign. Shane was patient, professional, and really knew his subject matter. 100% recommendation. I know the obstacles he was facing not being able to see the sign while programming it... GREAT WORK!!
Polite, knowledgeable, problem solved!
These folks have great Products and the best service.
Awesome Service! Very friendly!
Shane is a life saver.Wonder4ful products & great support staff.
Excellent Customer Service... Sign Works Great and the Pricing is very affordable and flexible!!!
We called LED Sign City to implement a new sign for our business Dynasty Furniture USA. Any questions or concerns that we had - we called Shane. He made us a top priority and he handled our request with professionalism. We are 100% satisfied.
Working with LED Sign City has been a great experience. I am especially impressed with Shane who has given excellent post sign installation support. I highly recommend!
LED Sign City delivers quality product with friendly and knowledgeable service! Shane was great at helping us from start to finish!
Shane was a great help!! Got me setup and taught everything very well under 30 minutes!!
LED Sign City is amazing! We [Silver Creek Lanes, Bowling alley, Oregon] have had our sign for over 3 years now and it has been the best investment we have made with no issues. Shane walked me thru how to upload images and has always returned calls quickly with any questions we have had.
Top knotch service and support. Extremelly knowledgeable. Great signs, fast assembly and easy installations. Highly recommended!
Super helpful and the setup is fast and efficient! There is no part of this project I would do with another company, I will be adding more screen size soon!!!
Excellant service, called on time and solved some of my issues. Thank you Shane.
I feel like I got the best quality for the best price. The sign [for Mr. Planners, Kitchen remodeler, Indiana] gave us better quality than we thought we were getting. Top notch on shipping, payment support, and installation support...and patient to help us learn the easy to use program.
We [Arrowhead Motors LLC, Car dealer, Claremon] had a 15+ year old sign that was severely out dated. Designed a LED sign with Shane based on our specific needs and available space. He assisted us A-Z.Installation for us was easy. We are very pleased. We highly recommend this company.
By far the best LED Sign I have ever seen! Will do business with again!! [Sign installed for Leach Pharmacy in Tennessee]
"Incredible CUSTOMER service. Shane at LED Sign City went above and beyond setting up our new digital sign for our Car Wash, [Perdido Auto Spa in Florida]. Both the Sign and Service were outstanding. Thank you! "
LED Sign City has supplied our mult-site carwashes with top notch P8 and P10 LED systems. The quality of the LED displays is top notch and this company's top notch customer service and attention to detail. We highly recommend LED Sign City.
We experienced a few difficulties early on, but Shane was there with support every step of the way. The sign is now working flawlessly and looks great! Thank you Shane!
Best customer service experience with both pre and post sale. They support you through the sale and beyond that. Highly Recommend!! [Sign installed for The Brass Tap,Bar, United States]
We just purchased a new sign from LED Sign City and were overwhelmed at first. They walk you through everything you need to know and make it simple. It truly was a great experience and I won't hesitate to call again. Thank you so much for taking the time to make our sign work.
Great equipment and customer service. Every time we need help Sean is available to help us. WE [H2o North America (Car Wash), in Maryland] have been working with them for more than a year and no complaints..!!!!
Thank You guys for the best sign and most important, best customer support there is :) I highly recommend! [Sign installed for Optivita Nutrition in Paradise, Nevada]
Shane was very helpful and patient with our 3 person working through networking our system. Thank you for the dedication to your customer success! [Sign installed for Try City Christian School, in Vista, California]
Absolutely awesome experience. Great quality and customer service. They go above and beyond to be helpful. Shane was patient and thorough in answering all of our questions. [Sign installed for The River United Pentecostal Church, in Parsons, Tennessee]
I have owned my LED Sign for over 2 years and we love it [For Jacobson Funeral Home, L'Anse, Michigan]. The support at LED has been fabulous. When I did need help with setting up or trouble shooting any issues they wereprompt, friendly, helpful, and knowledgeable. I highly recommend LED Sign City.
The customer service and speed of service was amazing! Shane went above and beyond to help me to get the products. I needed in time for my event and provided video tutorials as well as telephone support to program my displays. I highly recommend.
Shane is very helpful when not understanding certain things about our new sign. Thanks Shane!
Thanks for all your help LED Sign city, Specially Shane for answering every question i've had. From [Stakes Auto Sales, Car dealer in Fayetteville, Pennsylvania] He makes things a lot more simple.
We purchased a sign from LED SIGN CITY and the experience was GREAT!! Their knowledge is second to no one on an LED sign and their tech support is AMAZING!!! I would highly highly recommend doing business with them. A++++++
awesome sign many positive comments from customers already
"I GOT MINE FEW DAYS AGO THIS SIGN IS AMAZING YOU HAVE NO IDEA WHAT YOU MISSING OUT TILL YOU SEE IT GREAT WORK ,SHANE IS AWESOME HE WILL GIVE YOU A PRICE THAT YOU WILL NEVER EVER DREAM OF ALSO VERY PRO I THANK YOU SO MUCH LED SIGN CITY"
This is a great company. They provide a great product. They are very customer oriented. They givetremendous technical support. If anything is faulty, you take a picture of it, send it to them and they replace it free of charge. [Sign installed for The Law Firm of David C Chavez, LLC in Los Lunas, NM]
The customer service is amazing. Prompt call backs and lightning fast tech support. If I have an issue these guys solve it within an hour remotely. highly recommend. [Sign installed for Audio One Electronics, Car stereo store in New York State]
I would give theircustomer service and technical support an A+. They made sure that the hardware and software was compatible with my old sign. I would do business with them in the future. [Sign installed for Prestwick Golf Course in Woodbury, Minnesota]
Price was Great and we [Sanctuary Church of God in Alabama] had a few problems that arose after we installed . But the staff worked well with us and got everything up and going.
Great Service..Saved a Ton & Shane is a great help. Highly Recommended for LED signs.
Absolutely the best place to buy an LED sign, their customer care after the purchase is second to none, highly recommend them!! Thanks Sane for all your support. [Sign installed for Eddies Steak Shed, Restaurant, in Indiana]
Led Signs made this very easy to do. Shane was great to work with on getting the sign i needed and setting it up.. I highly recommend them. service was outstanding. [Sign installed for Bunkers of St. Croix, Inc, Auto parts store in Virgin Islands]
Shane was able to help fix our problems even though we had purchased our sign at another store. Great to deal with, will be sending my business their way.
Shane was absolutely the greatest. Was certainly very patient and worked with me until everything worked like it should. Customer service is hard to find these days but I certainly experienced "old fashioned" customer service today. THANKS!
We acquired an existing dealer, and needed to update the sign. Shane was extremely helpful in this, and took him no time at all to configure what we wanted. We may consider signing up with a monthly plan to just send in what we need advertised and Sign City make the changes
Shane was a tremendous help in getting our new sign setup. He had an amazing way of simplifying the process. He was very knowledgeable about our needs. We are excited to be working with SignCity.
Excellent customer service and tech support! Highest ratings and praise for this company's commitment to their customers. Shane was and still is a wealth of knowledge, and we feel comfortable reaching out to him when we have questions.
LED Sign City provided excellent customer service and Shane was amazing and very helpful with any issues we needed resolved!! We would highly recommend them in the future.
Gateway Marina Harrison Idaho: Highly recommended. Great product quality and responsive customer service! thanks for everything!
We purchased a 4x9 8mm sign from LED Sign City almost a year ago. It looks great and we are very happy with it. Tech support has also been very helpful. Thanks guys!
N/A
Shane does an excellent job. I would suggest this company to anyone looking for a sign. Mark
Great products, great service, answered our questions right away. Have had a system installed 4 years now, had a card go out and they helped us immediately! Highly recommend!
Great Support Team. I am especially impressed with Shane who has given excellent post sign installation support. Very helpfull.
Great company to deal with. Bought 3 signs so far and customer service along with tech support are the best. Thank you for the great signs that are now growing my business
LED Sign City has been a great company to work with. We have utilized their equipment and customer service to their full potential and have been satisfied since the first training session. Shane, in support, is extremely knowledgeable, professional and patient.
Hands down the best customer service and product. We have ordered many signs for many store fronts and have been happy with the pricing, service, and when needed tech support! Highly recommend for digital displays. The colors and brightness are amazing and the software is user friendly.
Bottom line - Service after the sale.. Works here - Thanks Shane
We purchased our sign a month ago and it was one of the best investments we have made for our store. Their customer service is extremely helpful. I highly recommend this company, and they are very nice people to do business with.
N/A
We purchased a sign for our church and what a difference from what we had before! We received along the way was great as well! They were always friendly and eager to help. It's great to have not just a good product, but good customer support as well.
This by far is the best customer service that I have received from any company ever!!! I HIGHLY recommend Sign City!! Shane has been a lifesaver in training. We appreciate you!! If you are thinking of buying a sign, definitely buy from Sign City! A+++
LED SIGNS have been by far the best investment I have made for my business. thanks to shan. he guided me on the installation and gave me all the time to learn the software and setup. thank you ''LED SIGN CITY'' more IMPORTANTLY thank you SHANE!! i highly recommend.
Led Sign City provided us with an excellent product, great price and world-class service. I highly recommend Led Sign City to anyone considering the purchase of a sign. you won't be disappointed.
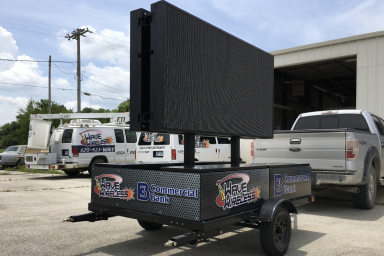
Very good experience. They worked with us throughout the entire set up process. They coordinated the fabrication of a mobile platform for our sign with one of their business partners that also had excellent service. Great experience all around.
My first encounter with LED Sign City was a bit unnerving. I was put at ease by my representative within 60 seconds of his call. Thank goodness he understood and has now helped me along to where I can place my own ads on our sign and be proud of what I am doing. I highly recommend this company.
We love LED Sign City. Product performance is spectacular and price was affordable. Shane made the whole process simple. From choosing the correct screen size and resolution to installation and training. Thank you very much for your continuous support!
Shane is very kind and always helpful. They are reliable and honest. I will always buy from them.
Shane was very helpful in setting up our sign. The Church Members are very happy with the sign. We highly recommend LED Sign City
Fantastic customer service! They went above and beyond to get us what we needed on a short timeline and helped us. Shane was knowledgeable and extremely helpful. Highly recommended!
Very helpful and great to work with. Sign has been excellent. Prices are wonderful. This company has been very quick to give quotes and answer questions.
Shane was super helpful, he took the time to even show us how to do some extra effects. He also called back in a matter of minutes to assist us.
LED Sign City, I searched the world over to find, Shane. Never before has owning, maintaining and enjoying the benefits of a LED sign been so easy. Shane, does what he promises. The ones I bought from Sign City are still going strong. Thanks for being a great company.
A+++ Service with LED SIGN City!! Everytime I call they get back to me promptly and help me with every need. Highly recommended! Thanks Shane!!
Everyone loves our new sign. Shane has been great with follow up customer service! Highly recommend them!
Shane is amazing, quick, and efficient!
Highly recommend LED Sign City. They are great to work with. Great product and Tech support is awesome.
Good product and an amazing customer service
Review for Sensenigs Landscape supply, LED sign city has been great to work with, Shane is the guy to work with if you need anything. Sign turned out mint
I love the customer service I get with LED Sign City. Shane has been so helpful to me during the learning process. They are always patient with me and never make me like I am a bother.
Working with Shane about ordering a custom LED sign went very smooth and he was very professional helping me design these 3 signs, they arrived perfect and first week I noticed a increase in traffic coming into my store and numerous customers said the signs attracted them into my store. Highly reccommend.
These guys are absolutely the greatest! So knowledgeable and always available for help...!
Totally amazed at the quality of the led sign. From the excellent packaging, easy setup and the sign is absolutely beautiful. Money well spent. Customer support is top notch. I would recommend Led Sign City to anyone. The system they have built is truly a work of art. I am extremely pleased.
LED Sign City and Shane was extremely helpful from start to finish in getting our sign made, financed, and installed. I would highly recommend them to anyone considering a digital sign purchase.
Thanks Shane for all the help, Is a pleasure dealing with you.
LED Sign City has given us value and quality time and again with the purchase of our new sign for our church. We've had to reach out for a little bit of training on how to use the sign program application, but Shane and the team have been incredibly responsive, helpful, knowledgeable, and patient.
Shane was very helpful. He was able to creatively walk me through fixing our LED sign. Would defiantly recommend.
Excellent! We've had our sign now for a few months and everything has been amazing from pre-ordering, ordering, delivery, set-up, and the occasional calls we've had to make to help us understand new things. Shane is great to work with.
Excellent quality and A+ customer service so far!
Shane with the IT support team has been great to work with! As we had issues arise during configuration; he was very patient and knowledgeable! Thank you, Shane!
The customer service provided from this company has exceeded any and all expectations. They go above and beyond to answer my questions and have fabulous tech support. I am so glad we bought our church sign through LED Sign City. Thank you LED!
Led sign City has one of the best tech support whenever I needed. Tank you Shain.
Customer service was extremely helpful and patient with my team. Walking me through the steps to get our sign working. 5 stars. Thank you Sign City.
Very happy with the service, the LED screens look great, we went through many companies like Daktronics, SmartLED, Prime LED Signs, Mega LED Signs, Soul LED and SDATONE LED SIGN CITY had the best prices and service, I and our clients are very satisfied with the quality of the product and customer servie
Great service and very professional A++++ I will definitely continue doing business and recommend them. Thank you
What a wonderful company and experience altogether. The entire process was made so easy from payment to installation. Shane is a master at what he does and was always available to give courteous and professional help. Definitely would do business again.
Purchased two LED signs. Great service and Excellent support. I got quotes from other companies and signs with the exact specifications were two to six times higher. I have had to call for technical help and they have been very quick to respond and willing to help.
Shane did an excellent job assisting me on everything I needed. Highly recommend this place!
Excellent staff and customer support! Shane walked us through the entire process from sizes, quality, install plans, setup, and creating our first slide show!! Highly Recommended!!!
The LED sign we bought from LED SIGN CITY has made quite the impact on our little community. The sign quality is unbelievable! Customer service was very knowledgeable and friendly. Will recommend them to everyone.
Convinced by our glowing reviews? Join our satisfied customers. Make your own mark with a custom sign or save your quote as you decide.
XIGNZ by LED Sign City: The Future of LED Signage
Experience the evolution of LED signage with XIGNZ, exclusively developed by LED Sign City. Our innovative, modular design not only sets your display ahead of trends but also adapts seamlessly to your evolving business needs. With XIGNZ, your investment in LED signage becomes more than just a purchase—it's a long-term asset for your brand's visibility and appeal.
Want to See How Our Signs Upgrade Effortlessly?
Why Choose XIGNZ?
- Future-Proof Design: Stay ahead with easy updates to the latest LED technology, ensuring your sign remains vibrant and cutting-edge.
- Modular Flexibility: XIGNZ's modular design allows for effortless expansion or reshaping of your sign, catering to your brand's changing needs and spaces.
- Cost-Effectiveness: Beyond offering superior longevity, XIGNZ represents a smart financial decision, maximizing value over time with its durable, upgradeable components.
- Enhanced Aesthetics: Our commitment to superior design means your brand benefits from signage that’s not only functional but stunningly attractive, enhancing your visibility and impact.
- Beyond Standard Warranties: XIGNZ stands out with its interchangeable components and reliable performance, offering peace of mind well beyond typical warranty periods.
XIGNZ: A Revolution in LED Signage
Developed to revolutionize the way LED signs are constructed and maintained, XIGNZ simplifies the assembly process, enabling easy in-house upgrades and modifications. By reducing the complexity and number of components, we've created signage that not only looks great today but will continue to do so for many years. The upgradeable nature of XIGNZ slashes replacement costs and ensures your sign is a valuable asset for your company, year after year.
Embrace the future of signage with XIGNZ: where innovation meets flexibility, beauty, and unparalleled value.
Size-Dependent Specifications: Tailored by Model Dimensions

Screen Size:
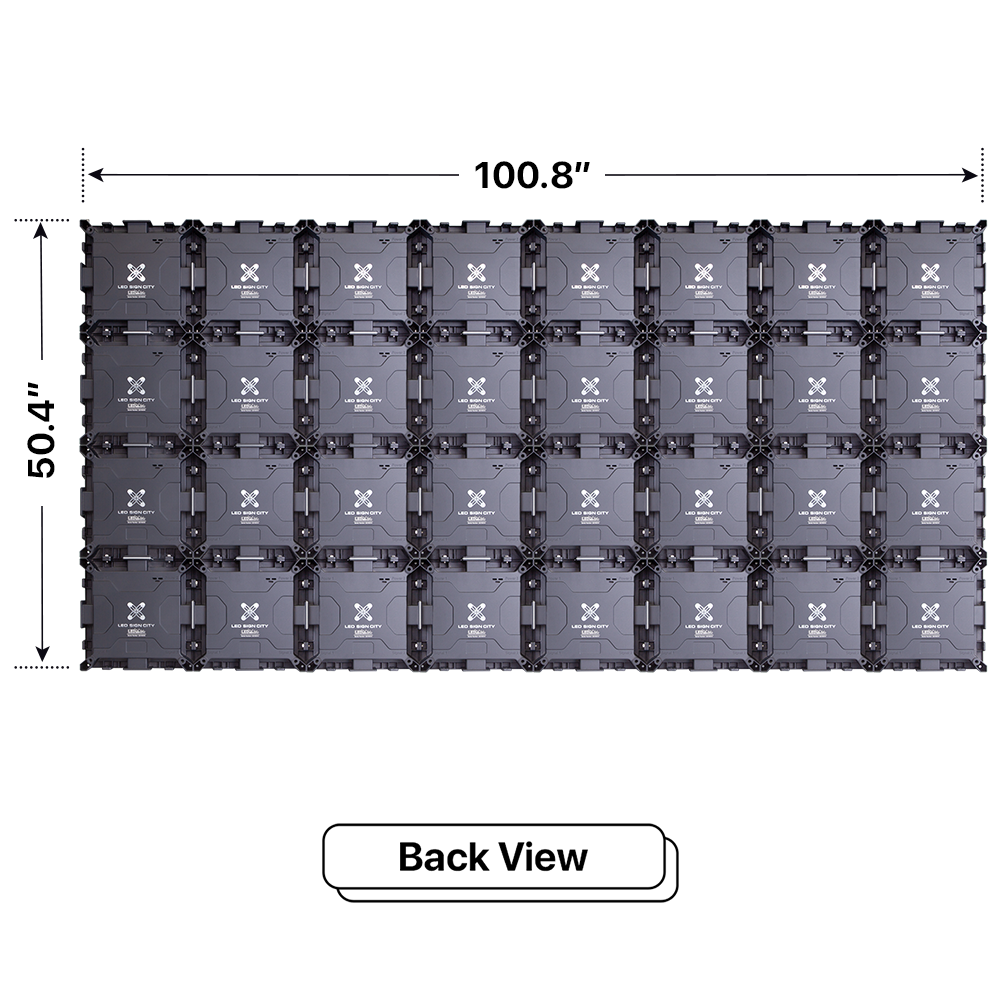
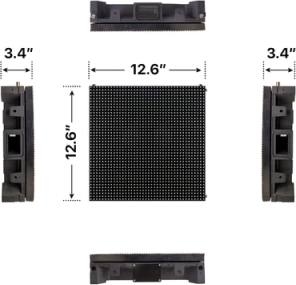
1 feet x 31 feet
Actual: 12.6 x 390.6-in

Cabinet Weight:
10-lbs. / sq ft.
Max weight:
(1x31)x10 = 310 lbs/side

Power use:
95 Watts / sq ft.
Power consumption:
Max 2945 watts
Resolution-Based Specifications: Defined by Display Quality
Beacon HD: P6 MM
Pixel density:
2304 Pixels
Display Resolution:
48 pixels x 1488 pixels
Brightness:
Beacon HD 7000 Nits Beacon HD Pro 8000 Nits
Beacon: P8 mm
Pixel density:
1600 Pixels
Display Resolution:
40 pixels x 1240 pixels
Brightness:
Beacon 7500 Nits Beacon Pro 8500 Nits
Spotlight: P10 mm

Pixel density:
1024 Pixels
Display Resolution:
32 pixels x 992 pixels
Brightness:
Spotlight 8500 Nits Spotlight Pro 10000 Nits
Lighthouse: P16 mm

Pixel density:
400 Pixels
Display Resolution:
20 pixels x 620 pixels
Brightness:
Lighthouse 9000 Nits Lighthouse Pro 11500 Nits
Universal Specifications: Consistent Across All Models

Media Support:
Images, Videos, Slides, and more.

Communication:
LAN, WIFI, 4G (Optional)

Viewing angles:
110 (V) 110 (H)

Design:
XIGNZ Modular LED Sign

Automatic Sensors:
Temperature and Brightness

Protection Level:
IP65 | UL 48

LED Standard:
DIP SMD 3 in 1

Compatible Devices:
PC, IOS iPhone/IPAD, Android

Aluminium Cabinet:
High-temperature Resilient
Impressed by the high standards and capabilities? Expect more from your sign. Tailor your LED sign with precise specifications or save your quote for a closer look later.
Resolution-Based Specifications: Defined by Display Quality
Beacon HD: P6 MM
Pixel density:
2304 Pixels
Display Resolution:
48 pixels x 1488 pixels
Brightness:
Beacon HD 7000 Nits Beacon HD Pro 8000 Nits
Beacon: P8 mm
Pixel density:
1600 Pixels
Display Resolution:
40 pixels x 1240 pixels
Brightness:
Beacon 7500 Nits Beacon Pro 8500 Nits
Spotlight: P10 mm

Pixel density:
1024 Pixels
Display Resolution:
32 pixels x 992 pixels
Brightness:
Spotlight 8500 Nits Spotlight Pro 10000 Nits
Lighthouse: P16 mm

Pixel density:
400 Pixels
Display Resolution:
20 pixels x 620 pixels
Brightness:
Lighthouse 9000 Nits Lighthouse Pro 11500 Nits
Our LED digital signage comes with a plethora of flexibility. The built-in software helps users find the easiest ways to maximize the viewing experience for their audience. Explore the cornucopia of benefits!
- Seamless Transitions: Smooth animations seamlessly switch between content to capture and retain viewer interest.
- Customizable Text: Convey any message clearly with a wide range of text fonts, colors, and sizing options to fit your brand.
- Vivid Images: Showcase products, services or promotions with high quality, colorful images and photographs.
- Smooth Video: Stream high-def footage directly on your signage for immersive and engaging ad content.
- Automated Slideshows: Effortlessly rotate multiple graphics and messages to display diverse content.
- Clock: Display real-time clocks in various formats, adding a practical element to your signage that keeps viewers informed throughout the day.
- Weather: Offer live weather updates including temperature, forecasts, and weather conditions, enhancing the utility of your sign for the public.
- Countdown: Create anticipation for upcoming events or promotions with countdown timers, a powerful tool for driving engagement and interest.
- Schedule: Plan and automate your content display according to specific times and dates, ensuring relevant and timely information is always presented to your audience.
Excited by the creative control our software offers? Design with freedom. Customize your sign for unique expression or save your quote to explore all features.
Services:
1. Do you ship and install the signs?
Yes, we provide shipping across the USA and also have a network of installers who can help you build the signage structure from the ground up.
2. Can I install the sign myself?
Certainly! If you have the right tools, you’re welcome to undertake the installation. We provide instructional videos and online support.
Want to know more about installation? Chat with us
Software:
3. Does the sign come with management software?
Yes, every sign includes free software for creating and managing content, ensuring you can easily keep your messages up-to-date.
4. Can I manage the LED sign from my smartphone?
Absolutely, our signs are compatible with both iOS and Android devices, allowing you to manage content conveniently from anywhere.
Curious about software? Chat with us
Technical:
5. How does the sign adapt to outdoor lighting and temperature?
Our signs come equipped with sensors that automatically adjust brightness and performance according to the outdoor environment, ensuring optimal visibility and durability.
6. Is the LED sign weatherproof?
Yes, our LED signs are built to withstand harsh weather conditions, ensuring reliable performance and longevity outdoors.
Technical questions? Chat with us
Product Features:
7. What is the warranty period for the outdoor custom LED sign?
We offer a standard 5-year warranty, with options to extend up to 15 years for those looking for longer coverage.
8. How much power do LED signs consume?
Our LED signs are designed for efficiency, typically requiring a 20 amp circuit at 220 power or a 40 amp circuit at 110 power, with each square foot of the sign consuming around 95 watts.
Want to explore more features? Chat with us
Sales and Financing:
9. What is the lead time?
Typically, it's 6-8 weeks from order to delivery, though larger projects may require additional time to ensure everything is perfect.
10. Do you offer financing?
Yes, to make it easier, we provide various financing options to help spread the cost over time, including packages with no or low interest.
Questions about financing? Chat with us
Got all the answers to move forward? Take the next confident step. Customize your LED sign with newfound knowledge or save your quote as you finalize your decision.
What's Included in Your LED Sign Package:
Curious about what you’ll receive? Unbox creativity and quality. Customize your LED sign for a complete overview or save your quote to review what’s included.
Bringing your LED sign to life involves both careful assembly and secure installation. Follow the guide to unpack and identify parts, assemble the frame, attach LED modules, and connect the necessary cables. Finally, choose the right mounting method and ensure the sign is firmly and safely secured.
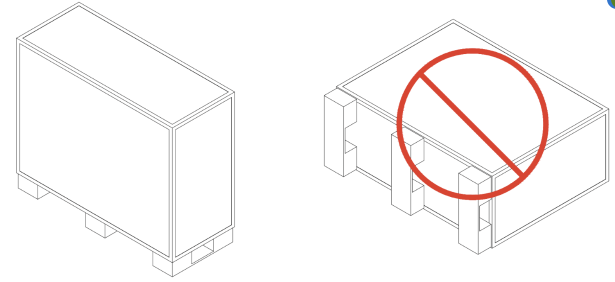
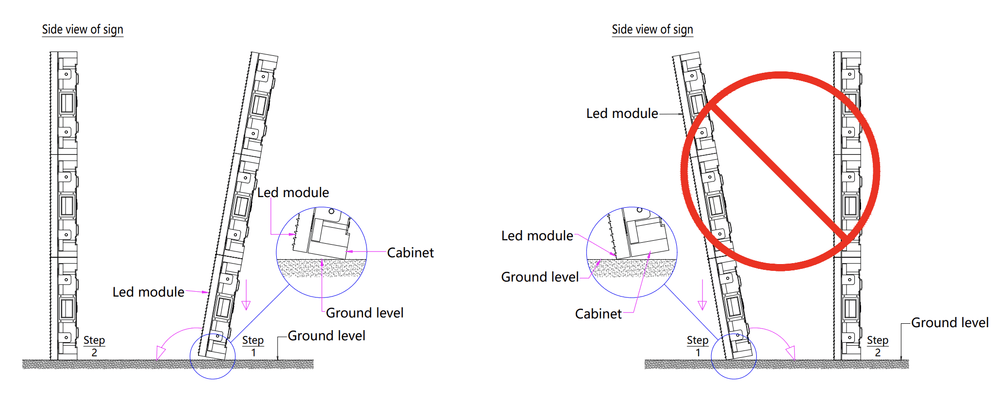
How to handle the crate and your LED Sign when unpacking
Tip #1 Always keep the crate upright. Avoid laying the crate flat on any of the sides.
Tip #2 Take care when unpacking the sign and avoid placing the weight of the sign on the LED Modules.
How to assemble your LED sign?
After unpacking the sign, inspect all the included LED Sign sections.
Tools and Parts that will be used in this step:
- 13/14 MM Ratcheting Wrench (not provided
- 17MM Socket (Not Provided)
- Drill / Driver (Not Provided)
- M10 bolts
- M8 Bolts
- X Bracket
Focus your attention on the edges of each section. You will notice that there are three (3) different configurations:
- Cable tunnel is open with a preinstalled rubber seal (ensure rubber seal is in every slot before connecting the M8 bolts.
- Cable tunnel is open with an open center metal gasket preinstalled.
- Cable tunnel is closed with a solid metal gasket preinstalled.
See illustration below.
- The open cable tunnel is the center edge.
- The closed tunnel with solid covers is the outside edges.
For signs with multiple rows, this will also help you identify which sections will be on top.
- The sections with the closed cabled tunnels on top are the top row
- And the sections with the open tunnel on top is the bottom row.
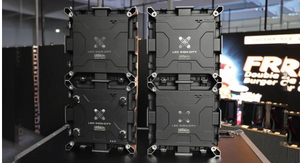
Once you have found the left and right outside edges, arrange your cabinets in the sequence A1, A2, A3, and so on. If your sign has multiple rows, start with the bottom row, then continue by installing the top row in the correct sequence.
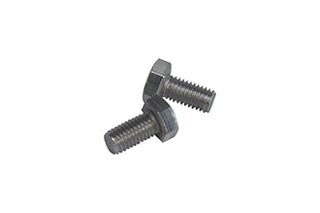
Next align the sections linking A-1 to A2 using the provided M8 Bolts.
- You will need two M8 bolts for each cable tunnel. For example, if your sign has three cable tunnels you will need six (6) M8 Bolts.
- Repeat this step until all sections are complete.
- Pay special attention to the front of the sign to ensure that bulbs are aligned as best as possible between sections.
Align the LED Sign Sections
After unpacking your X Series LED Sign, arrange your sign cabinets in sequence so that a clear hole aligns with threaded hole.
Insert The Bolts
Insert the bolt through the clear hole and screw it into the threaded hole to hold the signs in position. Each cabinet has two holes on the side.
Fasten the Bolts
Use the provided socket to fasten the upper and lower bolts on the side each cabinet.
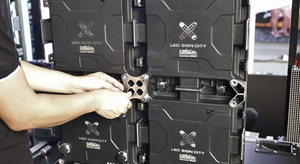
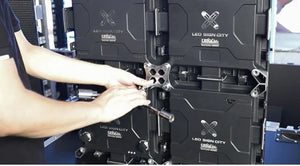
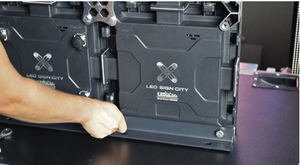
Attach the X Clip
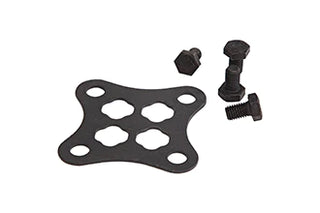
Place the X Clip in the center of every four cabinets and screw in the bolts to hold the clip in position.
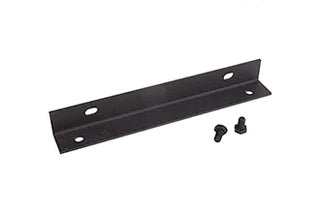
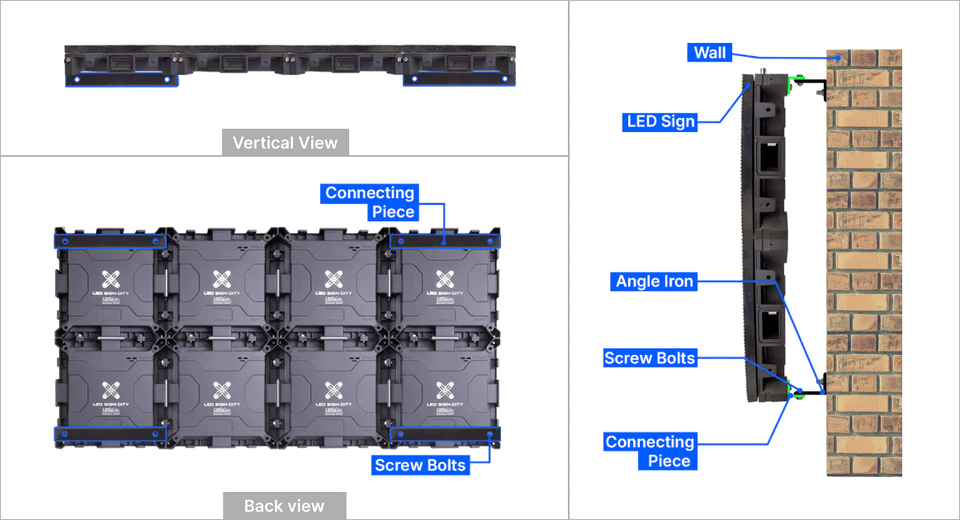
Install the Mounting Brackets
Position the brackets on the back of the sign and use the provided bolts to secure the brackets to the sign (Connect brackets as needed for install).
Lock Sign Sections together
Your LED Sign may arrive in preconfigured sections that you are required to connect together to assemble the required dimensions. Below we will walk you through the steps required to assemble your display and prepare for installation.
NOTE: For larger signs where the sections will be stacked. You will need to install addition m8 bolts where the cable tunnels on the top of the bottom row, and the bottom of the top row intersect. That’s two bolts for each cable tunnel (before installing, verify that there is a silicone seal on top of the bottom row, and that the open center metal gasket is installed on the bottom of the top row).
After you have connected all the sections, your next step is to install the supporting X-Brackets.
Take note of the pattern of preinstalled X-Brackets. There will be an X-Bracket at the intersection of four (4) modular cabinets. Place the bracket over the hole and use the provide M10 bolts to secure the bracket to the back of the sign.
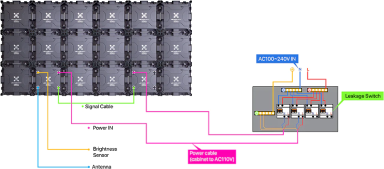
Tools and parts needed in this step:
- Power cables
- Signal Cables
- Antenna
- Antenna Cable
- Brightness sensor
Your power cables are the 13/14 AWG cables with a preinstalled 3 Pin Weatherproof connector on one end. The second end of the cable is either unfinished or has terminal connectors preinstalled.
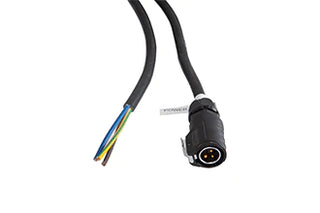
All Sections, except for the main section, have two power ports, with the labels Power 1 and Power 2. These ports can be used interchangeably. You will connect one power cable to each section. Plug the power cable to Power 1 on the main cabinet, and Power 1 or Power 2 on the remaining sections. One power cable is required per section.
How to identify the main cabinet.
The power 2 port on the main cabinet has been converted to your brightness sensor port. Depending on your configuration, there will be a 9-pin connector or 4 pin connect in the power 2 port on the main cabinet.
The main cabinet is usually on the left side of the sign (when looking at the front of the sign).
After plugging in your power cables, you will need to terminate the wires to your junction/breaker box (not included). Note the color code for your wires:
Connection for 110V
- Brown/Black – Hot / Live
- Blue/White – Neutral
- Yellow and green/ Green – Ground
Connection for 220V
- Brown/Black – Hot / Live
- Blue/White – Second Hot
- Yellow and green/ Green – Ground
Be sure to secure the power connector to them before turning the power on. And follow proper safety procedures to prevent electrical shock.
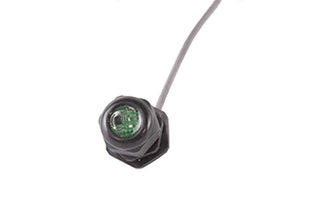
Your brightness sensor connects to the Converted / Power 2 on the main section. You will also see the sensor tag on the connector cover. The sensor and power cable use different pin configurations so it’s not possible to the sensor to the power or the power to the sensor.
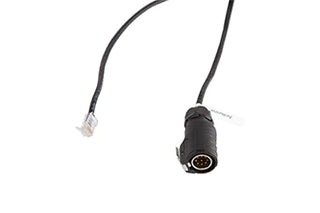
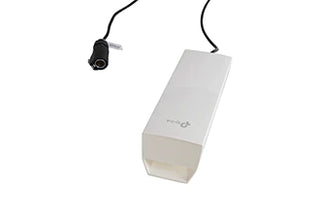
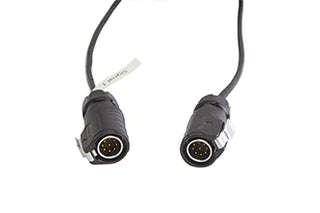
The antenna connects to the signal 2 port on the outside edge of the sign below the sensor. Your Antenna cable has a 9 pin connector on one end and an ethernet/RJ45 connector on the other end. Connect the Antenna cable to the signal 2 port on the main section. And connect the other end directly into your antenna. (note the included POE injector will not be used at this stage, so do not connect to the sign).
To connect the cable to the antenna, remove the cover at the bottom to reveal the ethernet port. Connect the cover and reinstall the cover. If you opted for the 4G LTE antenna, your antenna may have 2 ports. In this case connect the cable to the WAN Port.
Once they are correctly connected you should immediately see the power lights on the side or front of the antenna depending on your configuration. If there are no lights, check to make sure you connected to the correct port. You should also see the antenna label on the cap on the back of the sign.
When installing the antenna, ensure the antenna is installed vertically with the cable coming from the bottom of the antenna.
-
Your signal cable has two 9 pin connectors on both ends of the cable. Start by connecting the signal cable to the Signal 1 port on the main section. Then connect the other end of the cable to signal 2 on the next section. Repeat this step until all the signal cables are connected.

-
For double sided LED signs continue your connection by connecting to signal 1 at the end to the sign 2 on the other side immediately behind signal 1. Then continue your connect from sign 1 to signal 2. At the end you will have a signal 1 port available behind the antenna cable.
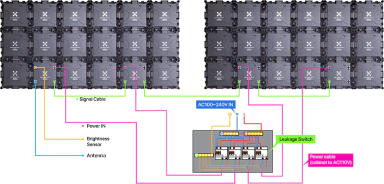
Note: if you have a larger sign that has multiple rows of sections. When you get to the end of the bottom row, connect your cable to signal 1 on the bottom row and jump to signal 1 on the top row.
Then connect signal 2 to signal 1 going in the opposite direction as the bottom row. At the end you should have Signal 2 available above the antenna and the sensor. (Imagine making a C-Shaped connection. If you have more than 2 rows imagine making a backward S-Shaped connection that continues until all sections are connected.
Ready to see how it all comes together? Build your vision with ease. Customize your LED sign for detailed guidance or save your quote as you prepare your space.
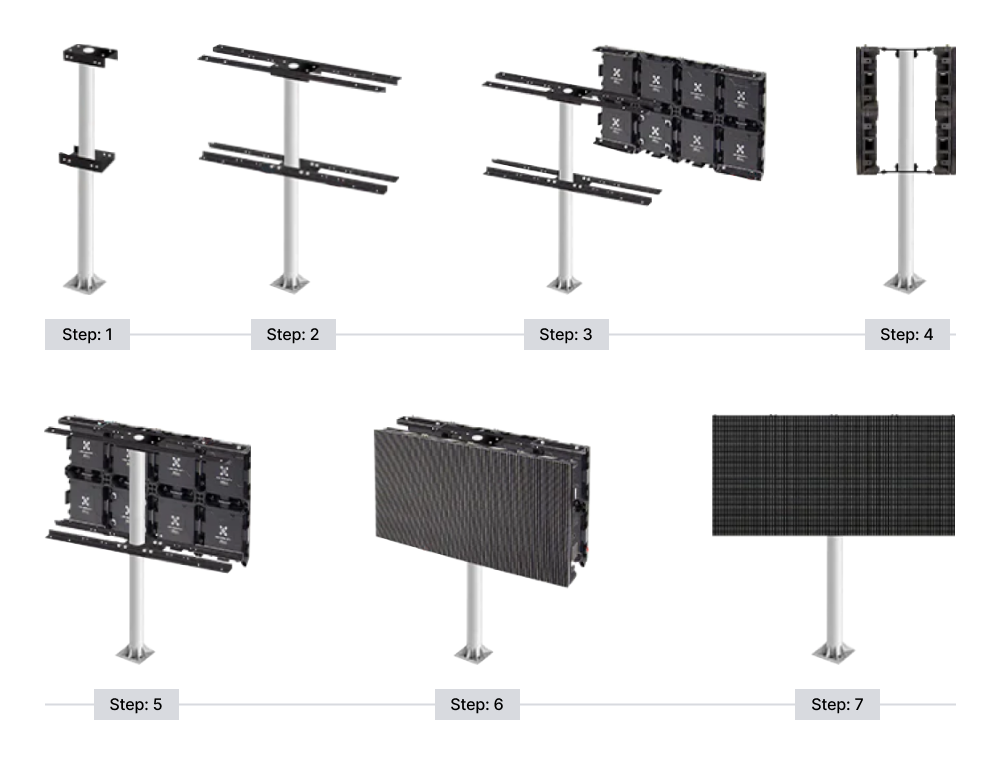
Mounting ideas for your LED sign.
Tools and parts required in this step
Angle Iron (L- Bracket)
Support bar / Frame – Illustrated below but not provided
Below are examples of how your LED Sign can be installed. The illustrations provided are for reference only. Always follow your local laws for guidance and construct structure based on required wind load rating and other local requirements.
Inspired by how others have transformed their spaces? Illuminate your own. Customize your LED sign for impactful installation or save your quote for the perfect setup.


